Behind the Scenes Creating the Merlinite Line
I attended the famous Tucson Gem and Mineral show for the first time in February of 2020. I couldn't resist buying many different rough gemstones to incorporate in my jewelry lines.
The Bedrock Rose Merlinite Gemstone Jewelry line began in May when I began slicing the rough Merlinite I brought back from Tucson.

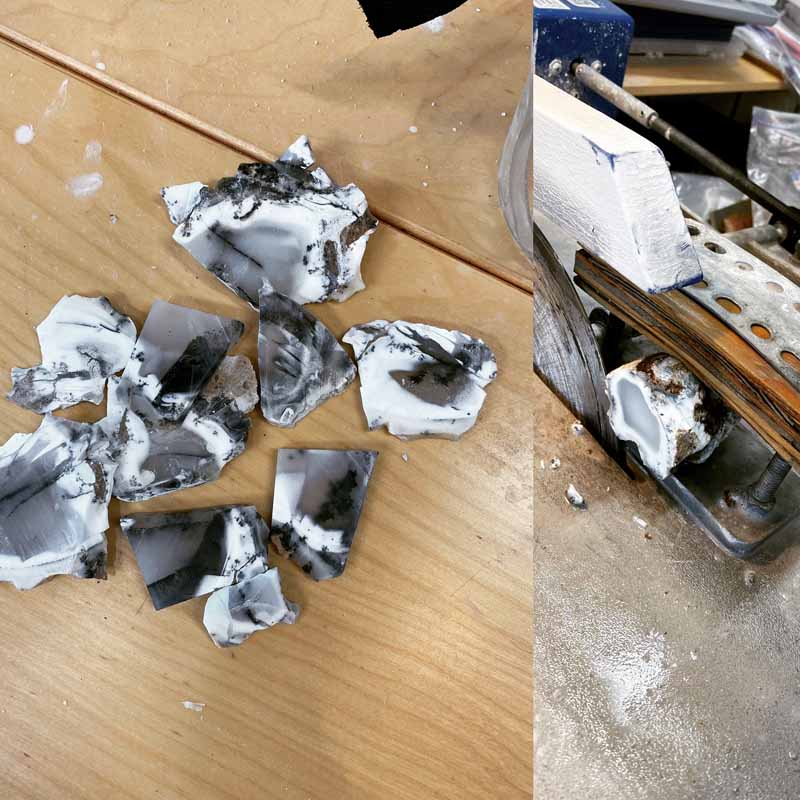
When I start cutting into a rough gemstone, I'm not sure what I'm going to find until the inside has been exposed. The Merlinite didn't disappoint, revealing the most amazing picturesque scenes. The black dendrites that are exposed in the white and translucent quartz look similar to landscapes.
After slicing the rough stone into thin slabs, I then use templates to aid in capturing the most interesting features of the stone.

Then on to the cabbing machine which has a combination of diamond grinding wheels and resin wheels of varying grits to first shape, then smooth, and finally polish the stone into what is now a 'cabochon.'
The next step in producing the jewelry line is actually designing the pieces. I do rough drawings of what I have in mind. Sometimes the piece ends up similar to what I drew--sometimes it takes a completely different direction. It's all part of the fun in design.
Now it's time to start making each piece of jewelry. I actually produce my own silver stock from sterling silver that I recycle. I melt the silver to molten stage, pour it into an ingot mold, and then roll it in the rolling mill until it reached the desired thickness (gauge) for me to work with. I've previously posted videos of the ingot process--super cool, check them out!
Each stone gets a custom fit silver bezel. This gets soldered shut, the fit of the stone gets checked, and the bezel then gets soldered to the backplate (the silver sheet I've just produced). Sometimes I put a texture on the silver sheet before attaching the bezel.
Now its time to cut the backplate to the shape I've designed. For a lot of the Merlinite line, I decided to also reveal the back of the stone to let the light through.
The fit of the stone is then checked. For those pieces that I didn't saw out the back, I use dental floss to be sure I can get that stone out again! Ask me why I must never forget to use dental floss before checking the stone's fit!😬


As part of designing the setting, I also need to take into account how it's going to hang on the chain. I used a variety of bails to best complement the setting. These bails allow for movement of the pendant.
Now it's time to set the stone. The stone is placed in the setting, the height of the bezel is checked and adjusted appropriately so that it will press into and just over the stones edge to secure it in the setting. This is some pretty precise work.
The piece is almost finished. It's time to antique the silver to bring out the highlights and lowlights of the textured silver. Then the piece gets a final polish to bring out the best shine possible.
Design and add the chains and then.....
Done!!! All ready for their photo session and listing on the site! I hope you love the pieces as much as I enjoyed making them.

Oh, and a special thank you to Smeagol, my studio cat, who kept me company every step of the way! Here he is on my lap while I was working on the Merlinite Collection, impeding something or other for the umpteenth time. He's almost like a stalker with how much he follows me around the house and studio. He's also sitting next to me right now while I write this!! I'm actually very blessed to have such a lovely cat to keep me company.
That's how the Merlinite Gemstone Line came to being! I wish I could show it to more people in person--happy to do so by appointment or virtually. Just give me a holler and we'll make it happen. 😃🌹
Thanks for reading my post and supporting me on this journey!